|
|
|
Construction Journal | | 4/30/02
-
Gluing the Fancy Inwale |  I've waffled back and forth on what kind of inwale I was going to go with. On the one hand, a nice simple inwale would be, well, nice and simple. I could get it done and move on to other things. On the other hand, everyone I've talked to about it urges me to go with the fancy one, rightly pointing out that when the boat is finally finished, I will have to live forever with the decision I make now, and while I will eventually forget the pain, trauma and anguish of fashioning the damned thing, I will always suffer from any decision to skimp on the construction to go with a simpler, less interesting approach. In the end I agreed with that and decided to go with the fancy one.
I started by trying to figure out how long each block should be and what the gap between them should be. I actually had very little to go on. There wasn't any mention of this little detail in the instructions or in Oughtred's book, so in the end, I judged by looking at various pictures. I went with a two inch block, with a gap of two and one half inches.
| | 4/30/02
-
Inwale Complete | 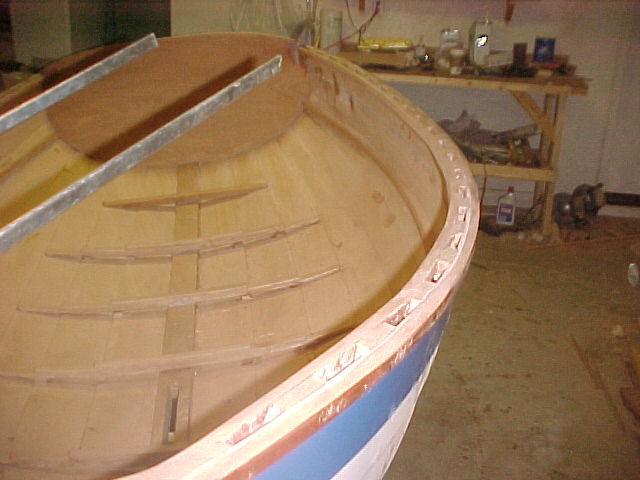 I'm actually pretty pleased with the look of the inwale. It's amazing how much additional stiffness this construction added to the sides of the boat, and my confidence that the boat won't simply collapse as soon as I put it into the water is marginally higher. I also like the traditional look it adds to the boat, and I'm happy with the way it blends in to the breasthook. Even so, it wasn't easy to do (although nowhere near as hard as I thought it would be.) I once again cracked the wood trying to get it to take the turn at the bow. This is becoming a pattern with me, and I've begun to refer to it as the poor man's laminating technique. As I pulled in the board with clamps, the cracks open up and I dump all kinds of epoxy googe into the exposed innards. The application of pressure on all sides does a great job of hiding the problem, and once the wood is sanded you can hardly see it. No problemo.
| | 5/22/02
-
Centerboard Case | 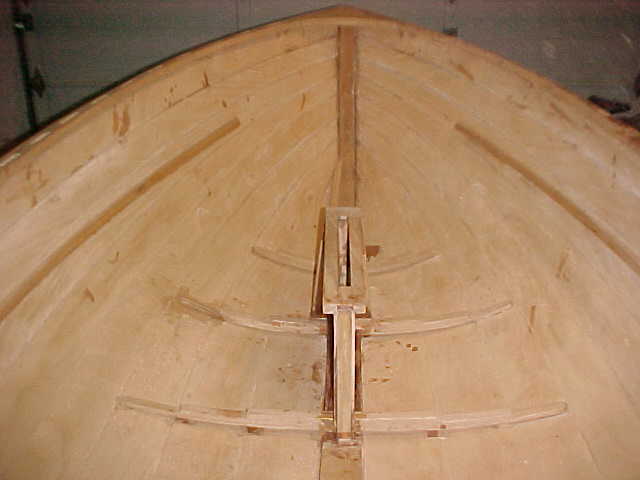 The centerboard case is kind of important since it keeps water from gushing into that gaping hole cut into the bottom of the boat. That being the case (heh heh) it needs to be fairly water tight. The interior surfaces are coated in epoxy for water resistance, and a great deal of care is taken to insure that all of the contacting surfaces are well sealed with epoxy. I spent lots of time getting it right, and in the end it came out well. Well, that is, until I actually glued it into the boat. I set up some boards to apply pressure while the glue set, and after I went to bed, apparently one side overcame the pressure being applied by the other and the case is slightly skewed now. You can see that in this photo. (It seems like this digital camera is taking poorer pictures these days, doesn't it?) It will be water tight, but it looks to me that with the centerboard in, the boat will be very good at turning to port.
| | 5/22/02
-
Transom Knees |  I had tried to put laminate the knees once before, but every time I tried to get the strips of mahogany to take the curve needed for the knees, I broke them. I was getting frustrated until I decided to try soaking them for a bit before trying to bend them. I rigged up the very latest in high-tech pre-lamination devices: the Bathtub and Bottle of Dog Shampoo Rig. A couple of hours of soaking and the wood easily took the bend.
| |
|

 Winner
of the coveted Walsh Award!
Winner
of the coveted Walsh Award!