|
|
|
Construction Journal | | 12/27/01
-
Attaching the Outer Stem, Part III | 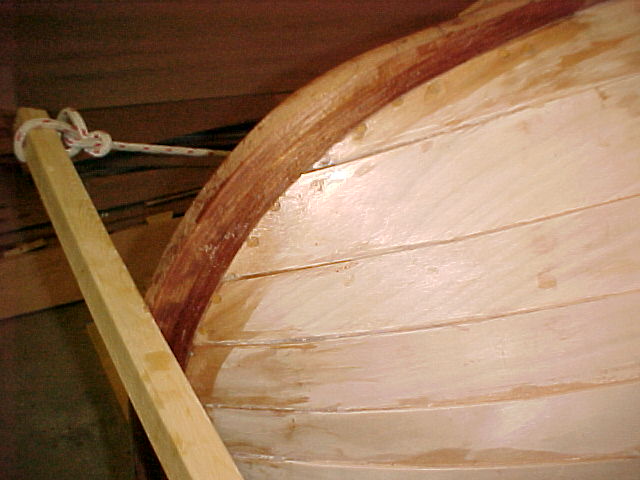 This is a nice close up of the stem. I pulled out all the stops with respect to pressure applying technologies on this boat part. First, I used a couple of clamps at the sheer, then I used a long 2X4 wedged between the ceiling and the stem along the top (bottom.) I also used a Spanish windlass to pull the stem in at mid point. All of these applications of pressure resulted in great squishes of epoxy, requiring me to smooth and re-smooth the stuff. Anyway, I guess it doesn't look all that bad after all. | | 12/28/01
-
Contemplating the Keel | 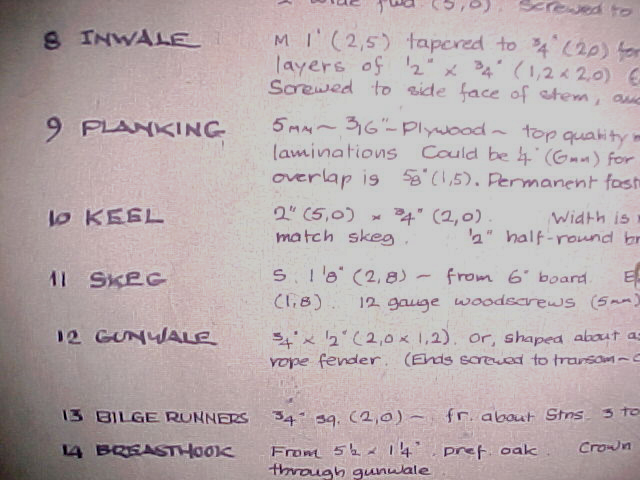
I said before that the keel was another story, and I'm going to open myself up to some embarrassment by relating this bit to you, but it does demonstrate that one has to think for ones' self a little bit when undertaking this kind of project. This is true especially for the amateur builder who has no mentor to turn to when the brain cramps up.
The plans call for a keel of 2"X3/4". Now, you can read this two ways. You can say that the keel is two inches wide and 3/4" of an inch tall, which kind of makes you picture a large, ungainly slab of wood stretching down the length of the hull. Or, you can think that the keel is 3/4" wide and 2" tall, which you can really picture as a sleek, thin rail sweeping gracefully allong the fair curve of the boat.
So you can guess where I was going, with the result that I shaped the end of the outer stem to 3/4" wide to mate with this fanciful picture of a keel firmly resident in my puny skull.
| | 12/28/01
-
Contemplating the Keel, Part II | 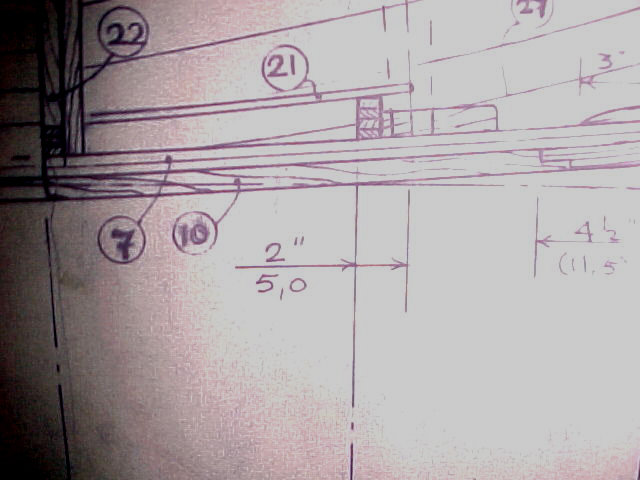
I sort of figured this out by examining this bit of the drawing, You can see that a dimension exists specifying a width of 2" for some other part off the picture, but you can also see that the keel, the bottom portion of wood running horizontally across the drawing, is considerably less high than the dimension spacing. That, plus the width of the outer stem at the base is about 1 1/2" wide, leads me to the understanding that I mis-cut the stem. O, agony!
So now I can shoot for making the keel about the width that the plans call for, and either re-making or otherwise fix up the stem to match, or I can match the width of the keel to that of the stem somehow and live with the result. This will have some impact on how the skeg comes together, so I'm going to have to think this through before I proceed with it. Strangely enough, it's this process of encountering problems and overcoming them that makes this project "fun."
In the meantime, I'll tackle the gunwales.
| | 12/29/01
-
First Gunwale, Part I | 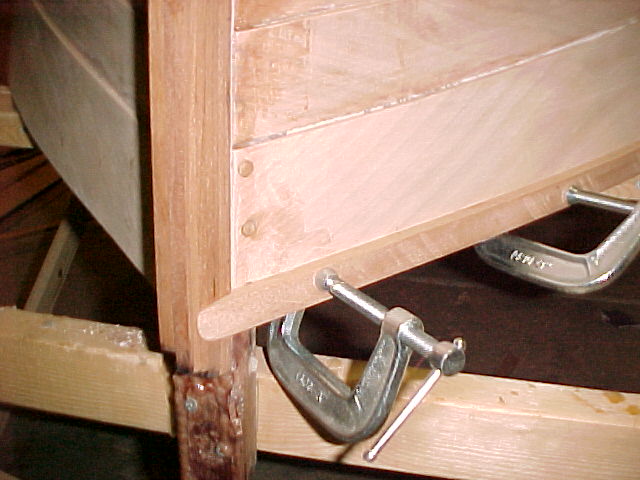
Okay, on to the gunwale. I bought a nice ten foot plank of 3/4" mahogany from which to rip the gunwales. I shaped the forward end to nicely mate it to the stem, and then while I was bending it around the sheer, it snapped in two. I nearly cried. I decided to stop for the night. Next day. Ripped another gunwale on the table saw. Shaped the end nicely (it's always nicer the second time.)
Here you can see that the dry run worked pretty well. Please, you purists, ignore the fact that I'm clamping here without protective wood blocks. I got tired of the blocks slipping out from between the clamp and the wood, so I took a shortcut. I know, I know, fine woodworking is not the place for shortcuts, mea culpa.
Time to glue it up.
| |
|

 Winner
of the coveted Walsh Award!
Winner
of the coveted Walsh Award!