|
|
|
Construction Journal | | 12/29/01
-
Second Gunwale, Part I | 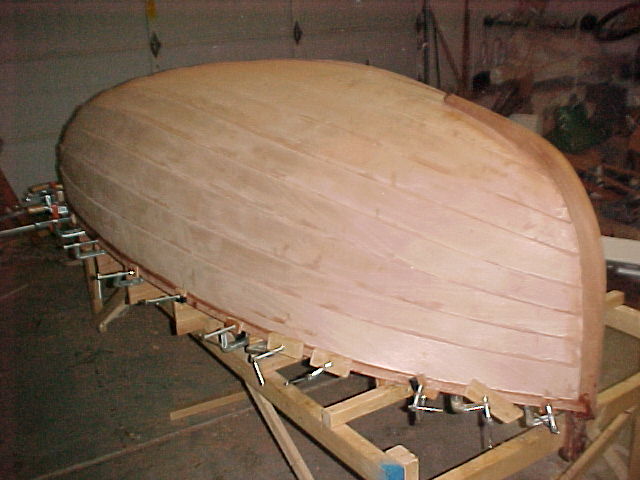
For some reason, it's been several weeks since I last worked on the boat. Work has been taking up lots of my time, but that's not the real reason since it's been that way in the past and I've always made time for the boat. Whatever the reason, I finally overcame all of the things that kept me away from this as yet un-named little vessel (suggestions anyone?) and I glued up the second outer gunwale. Like the first one, this one had a crack in the mahogany rail, and like the first one, I dumped some glue into the interior of the crack and clamped it tight and moved on. I'm beginning to understand that perfection is an elusive goal, the pursuit of which leads only to madness.
| | 1/20/02
-
Second Gunwale, Part II | 
This is a comparison shot of both gunwales from the bow. I'm pleased with each of them. They are both quite satisfactorily done in their own way, and that's the problem. They're different. The prospect of having the gunwales meet the stem in a different manner on each side is what was keeping me from tackling the job, I think, which is stupid, but there it is. In any case, when the glue sets, I'll attack them with a file and match them up as best I can. Someone told me that you rarely see both of them at the same time anyway, and very few people will notice. Stories of actors hating to see their own movie performances is beginning to make a lot of sense to me.
| | 2/3/02
-
Keel, Part I | 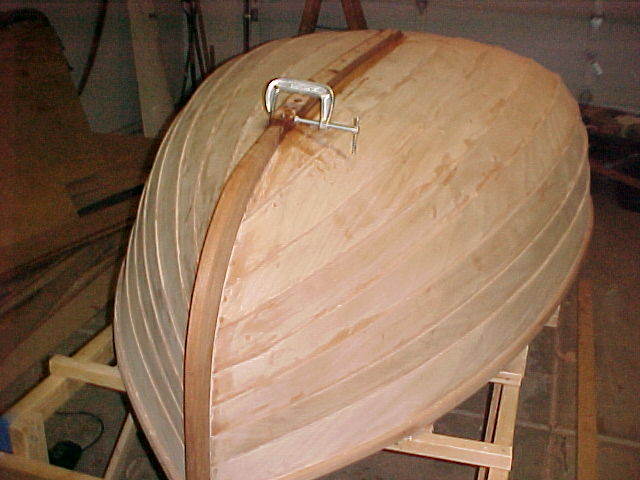
I've finally decided upon a strategy for installing the keel. I really don't understand why it's taken me so long to figure this out, but there you have it. I've decided to laminate the keel in place on the boat and use screws to hold it in place while the epoxy sets. Once the glue dries, I'll attack the keel with chisel and plane to shape it up in place, hoping against hope that I don't do any damage to the garboards. Here you can see the keel glued into place. I have a single clamp at the joint to keep the strips from splitting when I snug down the screws.
| | 2/3/02
-
Keel, Part II | 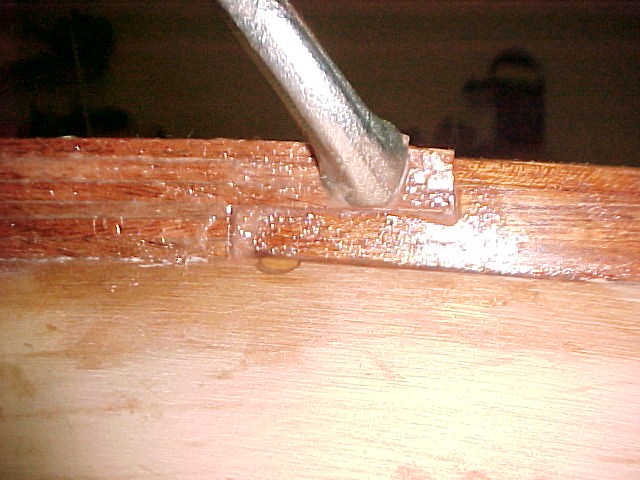
I actually glued the keel in two steps. First, I glued up three strips to but up against the outer stem. After the glue set, I smoothed the top surfaces of the laminations and the outer stem and filled the screw holes with a mixture of epoxy and mahogany saw dust. Then I glued up the top three laminates. You can see the joint between the keel and the outer stem in this close up. Doing it in two steps was a rare inspired decision for me. It's a real pain to deal with a bunch of gooey 1/8" strips, so doing three at a time made things much easier to deal with, and I'm happy with the way it came out.
| |
|

 Winner
of the coveted Walsh Award!
Winner
of the coveted Walsh Award!