|
|
|
Construction Journal | | 12/22/01
-
Plugs, Plugs, Plugs | 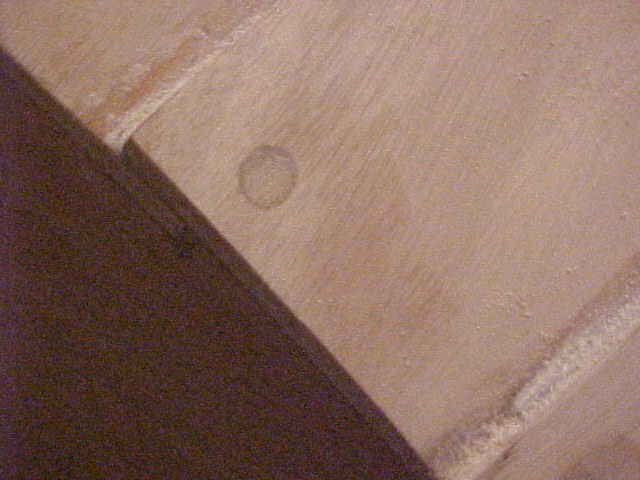 One other detail that I've managed to not think about for
quite awhile is the problem of all the screw holes I've put in this thing
to hold the planks down while the epoxy set. It's now time to fill them,
and I've already determined that just trying to use epoxy doesn't give as
good a result as I'd like.
So I bought some nice hardwood dowels and I proceeded to cut literally
millions of small 3/8" plugs. Okay, not millions, but a lot. I then dropped
all those little plugs into a bowl of pure epoxy (no microballoons) and
swabbed up each hole with a Q-tip full of the goo. Here is the result. | | 12/23/01
-
Wood for the Keel | 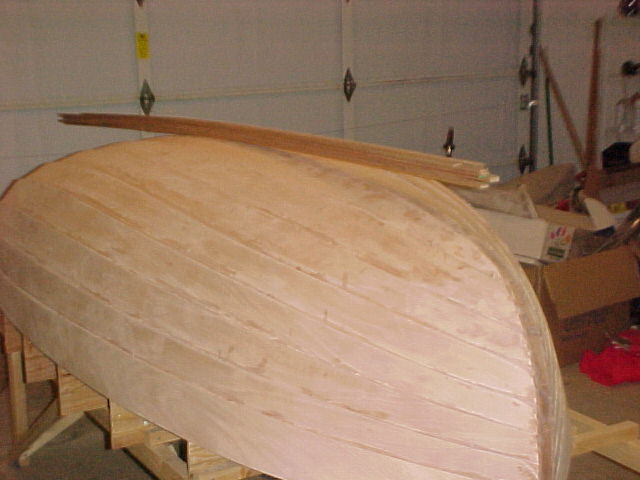 Here I've cut some mahogany for the keel. I've been trying to
figure out the best way to put the keel on, and since I don't trust
my fine saw-handling skills, I've elected to laminate the keel from
strips. I figured out that 1/2" strips will conform to the curve of the
boat just as readily as 1/8" strips will, only I'd already cut 4 of the
thinner ones. I keep telling myself that it will be a miracle if this
boat looks even half-way decent when I'm done. My faith now rests with
the compound miracles of micro-balloons and epoxy working with the fabulous camouflaging
abilities of paint. | | 12/27/01
-
Attaching the Outer Stem, Part I | 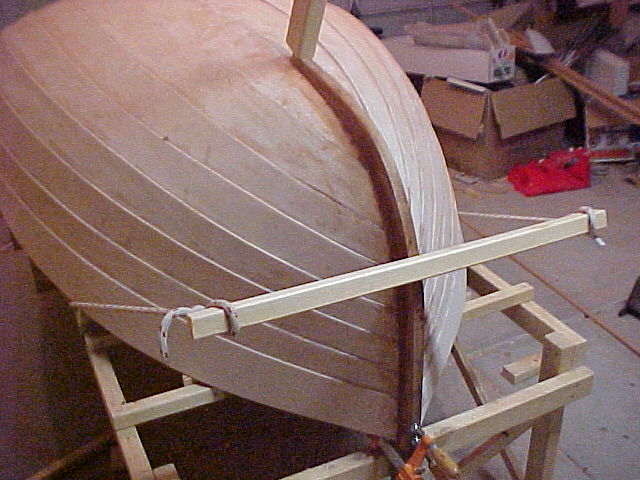 This morning I took a deep breath and decided to attach the outer stem. The instructions (seem to) call for attaching the gunwale first, but I found that it makes more sense to have the outer stem in plan to give the ends of each gunwale a nice place to land. I say seem to, because it's by no means clear. I'm also struggling with how the keel is cut & measured, but that's another story. Here I've pre-coated the stem and bow with pure epoxy, then mixed up a really nice, thick gooey mess of two handfuls of micro-balloons and two handfuls of very fine mahogany saw dust (for color) and applied it to the bow at about the thickness of good peanut butter. I then slapped the stem over the mess (I had alignment marks on the bow and stem to make this easier) and used clamps, overhead beams and a spanish windlass to hold this in place. | | 12/27/01
-
Attaching the Outer Stem, Part II | 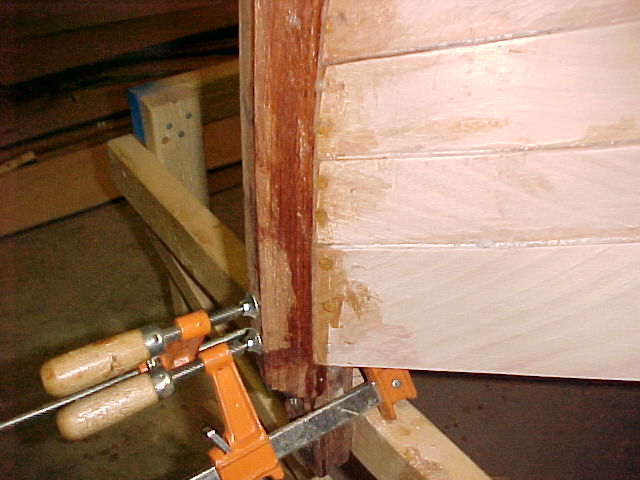 I spent a lot of time scraping and smoothing the epoxy, only to come back an hour or so later to find it had run some. Fortunately it was a little cold so it hadn't kicked yet and I was able to smooth some more. The down side is that I'm now afraid that the epoxy is too cold to kick. | |
|
 Winner of the coveted Walsh Award!